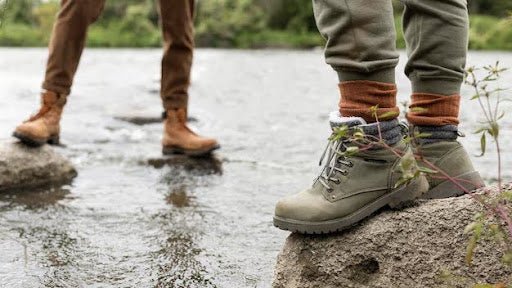
Nothing ruins a great hike faster than painful blisters. If you’ve ever laced up brand-new hiking boots only to find yourself limping halfway through your adventure, you know exactly how important it is to properly break in your boots.
In this article, we'll dive deep into how to break in new hiking boots without blisters, so you can hit the trails comfortably and confidently. Let’s get started!
Why Is Breaking In Hiking Boots So Important?
When you first buy hiking boots, the materials—whether leather, synthetic, or a combination—are often stiff and unyielding. Breaking them in gradually allows the boots to mold to your unique foot shape, providing better comfort, flexibility, and support.
Here’s why it matters:
- Prevents painful blisters and hot spots
- Improves stability and balance on uneven terrain
- Extends the life of your boots
- Maximizes comfort on long treks
In other words, properly broken-in boots aren’t just more comfortable—they're safer and more durable.
How Long Does It Take to Break in Hiking Boots?
The break-in period varies based on the material and construction of the boot:
- Lightweight synthetic hiking boots: 1–2 days
- Midweight leather/synthetic boots: 1–2 weeks
- Heavy full-grain leather boots: 3–4 weeks
Remember, it’s better to take the time now than suffer the consequences later!
Pro Tip: Not all hiking boots require a long break-in. Brands like Northside USA offer outdoor footwear designed for comfort right out of the box, reducing break-in time significantly.
Step-by-Step Guide: How to Break In New Hiking Boots Without Blisters
Let’s walk through a proven method that will have you trail-ready with zero blisters.
1. Choose the Right Size and Fit First
Before we talk about breaking in boots, it’s crucial to start with boots that fit properly.
Here’s what you should check
- Toe room: You should be able to wiggle your toes freely.
- Heel lock: Your heel shouldn't lift when you walk uphill.
- Snug midfoot: Your boot should hug your foot without pinching.
Always try hiking boots on at the end of the day (when your feet are swollen) and while wearing your intended hiking socks.
If your boots don’t fit correctly, no amount of breaking in will save you from discomfort!
2. Wear Them Around the House
Start slow. Wear your new hiking boots around your home for short periods—about 30 to 60 minutes a day. Walk on different surfaces like carpet, tile, and hardwood to get your feet and boots used to each other.
This gentle start allows:
- The materials to start flexing naturally
- Your feet to adjust without any stress
- Early identification of pressure points
3. Use the Right Socks
Choosing the right socks is just as important as choosing the right boots.
Go for moisture-wicking, padded hiking socks made from wool or synthetic materials. Avoid cotton socks—they trap moisture and dramatically increase your chances of blisters.
Layering tip: Some hikers use a thin liner sock under their hiking socks for extra blister protection.
4. Walk Around Town or the Neighborhood
After breaking them in indoors, move outside to casual walks.
Go for short, flat walks around your neighborhood or park. This step helps toughen your feet gradually without putting full hiking strain on your boots. Increase your walk time daily by 10–15 minutes until you're comfortably doing an hour-long stroll.
Need more outdoor walking ideas? Visit Northside USA for hiking gear that keeps you comfortable wherever your path takes you.
5. Take Them on Easy Day Hikes
Once you’ve logged about 5–10 hours of light walking, it’s time to hit the trails—but start easy.
Choose short, low-elevation trails with minimal obstacles. Bring a backup pair of worn-in shoes in case your boots start to feel uncomfortable mid-hike.
Pay attention to:
- Any rubbing, pressure, or tightness
- How your feet feel after the hike
- Early signs of hot spots (warm, red areas before blisters)
Adjust your laces if needed, and consider light moleskin padding for hot spots.
6. Gradually Increase Terrain Difficulty
After a few easy hikes, slowly introduce tougher terrain: rocky trails, steeper climbs, longer distances.
Let your boots and feet adapt together by progressively challenging them.
Don't rush it. You’re conditioning your boots and your muscles, joints, and skin toughness.
7. Condition Leather Boots (Optional)
If you’ve purchased heavy-duty full-grain leather boots, applying a leather conditioner can soften them slightly and help speed up the break-in process.
Use products specifically recommended by your boot manufacturer. Over-conditioning can damage boots, so don’t overdo it!
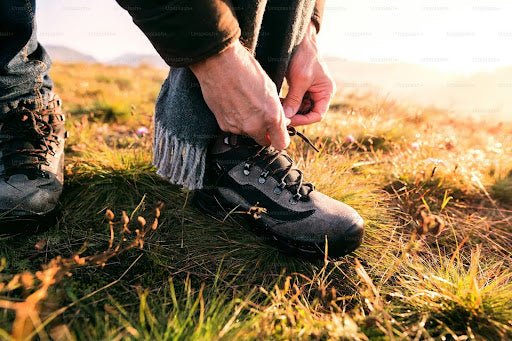
8. Adjust the Lacing Techniques
Different lacing styles can significantly improve comfort and prevent pressure points.
Popular lacing techniques:
- Surgeon’s knot: Lock your heel in place
- Window lacing: Relieve pressure on the top of your foot
- Toe-relief lacing: Prevent toe crunch on downhill hikes
Experiment to find the technique that suits your foot shape and hike style.
Common Mistakes to Avoid When Breaking in Hiking Boots
Learning how to break in new hiking boots without blisters also means avoiding these rookie mistakes:
|
Mistake |
Why It’s Bad |
|
Skipping the break-in process |
Leads to painful blisters and injuries |
|
Using poor-quality socks |
Causes moisture buildup and friction |
|
Ignoring hot spots |
Small discomforts can quickly turn into serious blisters |
|
Taking them on a long hike too soon |
Can permanently damage your boots—and your feet |
|
Improper lacing |
Causes unnecessary rubbing and pressure |
Be patient. Your future self on the trail will thank you!
How to Treat Hot Spots and Blisters (Just in Case)
Even with the best preparation, accidents happen.
If you start feeling a hot spot or develop a small blister:
- Stop immediately.
- Clean and dry the area.
- Apply a blister pad or moleskin.
- Adjust your sock or boot if needed.
Never pop a blister unless absolutely necessary—it's your body’s natural protection.
Pro tip: Pack a small foot-care kit whenever you hike, including blister pads, moleskin, antiseptic wipes, and extra socks.
Signs Your Hiking Boots Are Properly Broken In
You’ll know your boots are ready when:
- You can hike 5–10 miles without discomfort.
- There are no tight spots or slipping heels.
- Your feet and ankles feel fully supported.
- Your boots flex naturally with your foot movement.
At this point, your boots should feel like an extension of your body!
Best Hiking Boots That Require Minimal Break-In
Some modern hiking boots are designed with softer materials, flexible midsoles, and pre-shaped footbeds that significantly reduce break-in time.
Top features to look for:
- Breathable uppers
- Cushioned insoles
- Lightweight construction
- Soft, flexible outsoles
At Northside USA, you’ll find a range of hiking boots and shoes engineered for immediate comfort—perfect if you’re short on time or simply want a pain-free start to your adventures.
Key Takeaways: Mastering How to Break In New Hiking Boots Without Blisters
Breaking in hiking boots doesn’t have to be a miserable experience.
Follow these simple steps to ensure a blister-free, comfortable hiking journey:
- Choose boots that fit properly from the start.
- Start slow: indoors, then outside, then easy trails.
- Invest in quality hiking socks.
- Listen to your feet—treat hot spots early.
- Gradually increase hike difficulty and boot conditioning.
Remember: the goal is to mold the boot to your foot before you tackle that epic trail.
Your next adventure deserves better than painful feet. Take the time now, and you’ll hike stronger, farther, and happier!
Ready to hit the trails?
Explore comfortable, trail-ready hiking boots at Northside USA and make every hike an unforgettable experience!
Frequently Asked Questions
1. How long does it typically take to break in new hiking boots?
Most hikers need 1–4 weeks of gradual wear to properly break in new boots. Synthetic models can feel comfortable after a few days of short walks, while full-grain leather boots often require several weeks of incremental use to soften and conform to your feet.
2. Can I use heat or water to speed up the break-in process?
While some recommend lightly warming leather boots (e.g., with a hairdryer) or applying water, these methods can damage waterproof membranes and alter the leather’s integrity. It’s safest to break in boots naturally through progressive wear.
3. What socks should I wear to prevent blisters during break-in?
Opt for high-quality hiking socks made of merino wool or moisture-wicking synthetics, and consider lightweight liner socks underneath. These layers reduce friction, wick sweat, and cushion your feet against hot spots.
4. Should I condition leather boots before breaking them in?
A thin application of a leather conditioner can soften full-grain boots and help them flex more naturally. However, always use a product recommended by the manufacturer and test on a small area first to maintain waterproofing and color.
Dejar un comentario
Todos los comentarios se revisan antes de su publicación.
Este sitio está protegido por hCaptcha y se aplican la Política de privacidad de hCaptcha y los Términos del servicio.